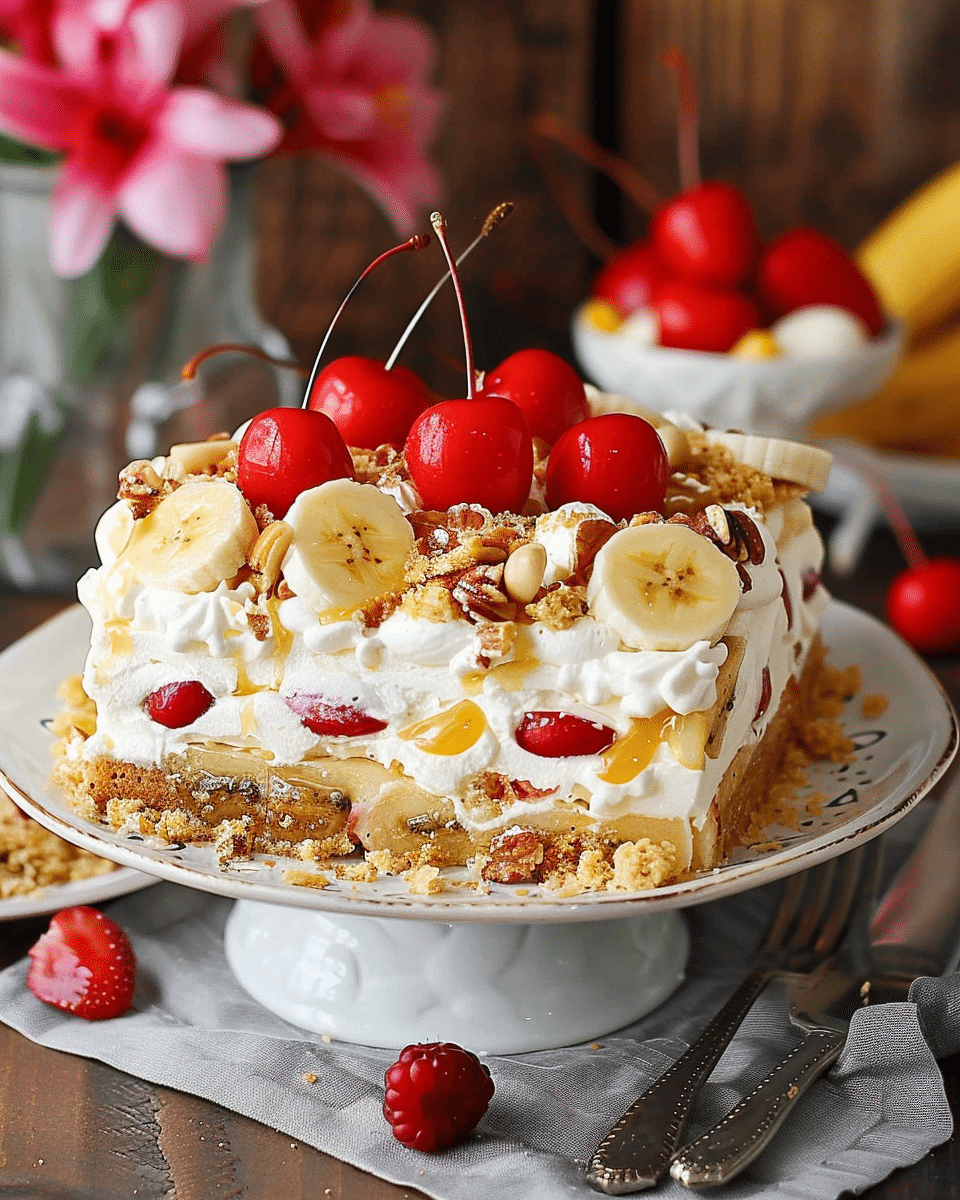
I love how this cake layers the classic flavors of a banana split into an easy, refrigerator dessert. It features a buttery graham cracker crust, a fluffy cream cheese filling in place of ice cream, juicy pineapple and bananas, and finishes with whipped topping, cherries, and nuts. It tastes indulgent yet only takes minutes of hands‑on prep.
ingredients
(Here’s a tip: Check out the full list of ingredients and measurements in the recipe card below.)
-
Graham cracker crumbs (about 2 cups)
-
Unsalted butter (total about 1 cup / 2 sticks), divided
-
Cream cheese (8 oz), softened
-
Confectioners’ sugar (about 2 cups)
-
Pinch of salt
-
Bananas (4, sliced)
-
Crushed pineapple (20 oz can, well drained)
-
Whipped topping (8 oz Cool Whip or homemade whipped cream)
-
Chopped pecans (⅓ cup)
-
Maraschino cherries (10 oz jar), drained and patted dry
directions
-
I melt half the butter (½ cup) and stir in the graham cracker crumbs. I press that into a 9×13″ pan and pop it in the freezer for about an hour to firm up
-
While that chills, I beat the remaining butter with softened cream cheese, confectioners’ sugar, and a pinch of salt until light and fluffy. Then I spread this cream cheese frosting layer over the chilled crust
-
I slice the bananas and, if desired, briefly soak them in reserved pineapple juice to prevent browning. I layer the bananas evenly over the cream cheese, then top with the drained crushed pineapple
-
I spread the whipped topping evenly over the fruit, making sure to reach the edges so the bananas stay sealed and fresh
-
Finally, I sprinkle on the chopped pecans and arrange the maraschino cherries across the top—one cherry per slice if preferred
-
I refrigerate it for at least 2–3 hours, ideally overnight, to allow the layers to set before slicing and serving
Servings and timing
This recipe yields about 10–12 generous servings from a 9×13″ pan. Active prep is around 25 minutes, plus at least 2–3 hours of chilling, or preferably overnight for best texture and ease of cutting
Variations
-
I occasionally sprinkle mini chocolate chips on top or within the whipped topping for extra sweetness and a chocolate touch—even though the original author avoided chocolate to keep the banana‑pineapple flavors front and center
-
I swap pecans with peanuts or walnuts, or use candied versions for texture and extra flavor.
-
If I prefer real whipped cream, I’ll make stabilized whipped cream instead of Cool Whip, especially if serving later
-
For gluten-free, I use gluten‑free graham crackers in the crust.
storage/reheating
I cover and refrigerate leftover cake for up to 3–4 days. Since it’s served cold, there’s no reheating—just slice and serve directly from the fridge. The whipped topping and cream cheese layers hold up well if kept chilled.
FAQs
What if I want to avoid raw eggs in the filling?
This version doesn’t use raw eggs—it relies on cream cheese and confectioners’ sugar instead for a safe, fluffy layer. No risk of uncooked egg products
Can I assemble it ahead of time?
Absolutely. I often make it the night before and refrigerate overnight—this helps slice it cleanly and allows flavors to meld.
Are bananas prone to browning in this dessert?
They can brown if they touch air. I sometimes soak banana slices in pineapple juice before layering, which helps prevent discoloration and keeps them tastier longer
Can I use fresh whipped cream instead of Cool Whip?
Yes—though homemade whipped cream can deflate over time. I recommend stabilizing it (e.g. with gelatin or mascarpone) if you need it to hold up for longer periods
Is chocolate appropriate in this recipe?
Tracey mentions that chocolate syrup overpowers the delicate banana and pineapple flavors. However, I like a light sprinkle of chocolate chips or drizzle for a playful twist if desired
Conclusion
I find this No‑Bake Banana Split Cake to be a delightfully refreshing dessert packed with banana, pineapple, creamy layers, and a cherry on top in more ways than one. It’s perfect for warm weather, potlucks, or any time I miss the nostalgia of a banana split but prefer a sliceable, shareable version. Let me know if you’d like tips on making it nut‑free, dairy‑free, or how to scale it or convert it into mini servings!
Print
No‑Bake Banana Date Split Cake
- Total Time: approx. 2 hours 20 minutes
- Yield: about 8 slices
Description
A chilled, luscious banana-date dessert layered with creamy coconut‑banana filling, sweet chopped dates, and a crumbly oat crust—no oven needed, perfect for hot days or light entertaining.
Ingredients
Crust:
1½ cups rolled oats (or oat flour)
½ cup chopped dates
¼ cup shredded coconut
3 Tbsp coconut oil or melted butter
Pinch of salt
Filling:
1½ cups mashed ripe banana (about 3 medium bananas)
1 cup Greek yogurt (or coconut yogurt for dairy‑free)
¼ cup honey or maple syrup
1 tsp vanilla extract
Optional: pinch of cinnamon or nutmeg
Topping:
Sliced bananas and chopped dates
Optional drizzle: melted dark chocolate or nut butter
Instructions
In a bowl, stir together rolled oats, chopped dates, coconut, coconut oil (or butter), and a pinch of salt until mixture holds together when pressed. Press evenly into bottom of an 8‑inch springform pan or square dish. Chill for at least 20 minutes.
In another bowl, mash ripe bananas until smooth. Stir in Greek yogurt, honey (or maple), vanilla, and optional spice.
Pour banana‑yogurt mixture over the chilled crust, smoothing the top evenly.
Layer sliced bananas and chopped dates on top of filling. Drizzle melted dark chocolate or nut butter if desired.
Cover and refrigerate for at least 2 hours (or overnight) to fully set.
Slice into squares or wedges and serve chilled.
- Prep Time: 20 minutes
- Category: Dessert


